Excel To CI Is used to import the data into database through
PeopleSoft Component Interface . Following example explains about importing simple data into Database.
FAQ :
1) What is the Excel to CI utility?
Answer: The Excel to CI utility has been developed to replace PeopleSoft Import Manager. It enables you, as the user, to upload data into the target PeopleSoft database from an Excel Spreadsheet utilising all the business logic and editing provided by PeopleSoft.
2) Where can I find the Excel to CI utility?
Answer: Every PeopleSoft installation will have a copy of the Excel to CI utility. The file is called ExcelToCI.xls and can be found in <PS_HOME>\excel directory.
3) Are there any limits to this utility?
Answer: Yes, Excel allows a maximum 252 columns and 65,000 rows.
4) Do I need to have database connectivity?
Answer: No, Excel to CI uses HTTP and SOAP messaging removing the need for database connectivity.
5) Are there any specific settings I need to be aware of?
Answer: Yes, Macro security needs to be set to low or medium. Also, the PeopleSoft user must have access to the ExcelToCI code via permission lists.
Follow the following steps to implement the Excel To CI
Utility
1) Grant access to the WEBLIB_SOAPTOCI iScript
Grant the above mentioned iscript in one of
the permission lists of the user who running it.

2) Enable Developer Menu in Microsoft Excel
> Go to Excel Options
> Click on the check box of Show Developer tab in the Ribbon

3) Make sure the macros are enabled (Microsoft Excel 2007)
> Open ExcelToCI.xls file which is located in the Excel folder of the PS_HOME
> Save As the ExcelToCI.xls Into Excel Macro-Enabled Workbook (xlsm format)
> The workbook name must have .xslm extension
4) Now open the Excel sheet , Need to supply the connection information and CI name associated with the component in further tabs
Open the connect information tab from the Excel sheet
.bmp)
Most of the time above mentioned details you can get from the URL of the PIA of the any random page , some need to collect from the DBA.
Web Server Machine Name - Name of the web server connected to
Protocol - HTTP/HTTPS
HTTP Port - Port Number Web server is using
Portal - Portal name using , Default is EMPLOYEE
PeopleSoft Site Name - PeopleSoft Site Name that was given at the time of installation of PIA ,Default one is ps
Node - PeoplSoft node name , Default one is PT_LOCAL
Language Code -ENG
Chunking Factor -No of rows of data to be transmitted to DB at one time , Default one is 40
Error Threshold - It can be set if we want to stop the import into DB after certain no of errors reached
Action - This will be automatically set when the CI is set
Most of the time you can fill the data by the PIA login URL
i.e http://hrms90v:9180/psp/HRMS90/?cmd=login
Web Server : hrms90v
Protocol : http
Port : 9180
PeopleSoft Site Name : HRMS90
.bmp)
5)Connect to Database to create template and submit data
Now go to Template tab and supply the Username ,password and CI name
>Click on Add-Ins From menu and select New Template

> Prompt will appear


New Data Input :


2) Enable Developer Menu in Microsoft Excel
> Go to Excel Options
> Click on the check box of Show Developer tab in the Ribbon
3) Make sure the macros are enabled (Microsoft Excel 2007)
> Open ExcelToCI.xls file which is located in the Excel folder of the PS_HOME
> Save As the ExcelToCI.xls Into Excel Macro-Enabled Workbook (xlsm format)
> The workbook name must have .xslm extension
4) Now open the Excel sheet , Need to supply the connection information and CI name associated with the component in further tabs
Open the connect information tab from the Excel sheet
Most of the time above mentioned details you can get from the URL of the PIA of the any random page , some need to collect from the DBA.
Web Server Machine Name - Name of the web server connected to
Protocol - HTTP/HTTPS
HTTP Port - Port Number Web server is using
Portal - Portal name using , Default is EMPLOYEE
PeopleSoft Site Name - PeopleSoft Site Name that was given at the time of installation of PIA ,Default one is ps
Node - PeoplSoft node name , Default one is PT_LOCAL
Language Code -ENG
Chunking Factor -No of rows of data to be transmitted to DB at one time , Default one is 40
Error Threshold - It can be set if we want to stop the import into DB after certain no of errors reached
Action - This will be automatically set when the CI is set
The types of actions available are based on the structure of the component interface. The actions are:
- Create.This option is available if the component interface has create keys. Use this mode when new keys are being added at level 0.
- Update.This option is available if the component interface does not have create keys. Use this mode if you are adding new children to an existing parent.
- UpdateData.Use this option to update specific non-key values that already exist. The system uses the keys to locate the row, and when a match is found, the row is updated with new data. If a key match is not found by the system, it displays an error message indicating which collection was missing a key match.When using the UpdateData action, you must provide all keys for the collection for the system to modify the data.
Most of the time you can fill the data by the PIA login URL
i.e http://hrms90v:9180/psp/HRMS90/?cmd=login
Web Server : hrms90v
Protocol : http
Port : 9180
PeopleSoft Site Name : HRMS90
5)Connect to Database to create template and submit data
Now go to Template tab and supply the Username ,password and CI name
>Click on Add-Ins From menu and select New Template
> Prompt will appear
Fill the details of ID, PWD of Application Designer that you created CI and CI name , Which you want to Import the data through your component
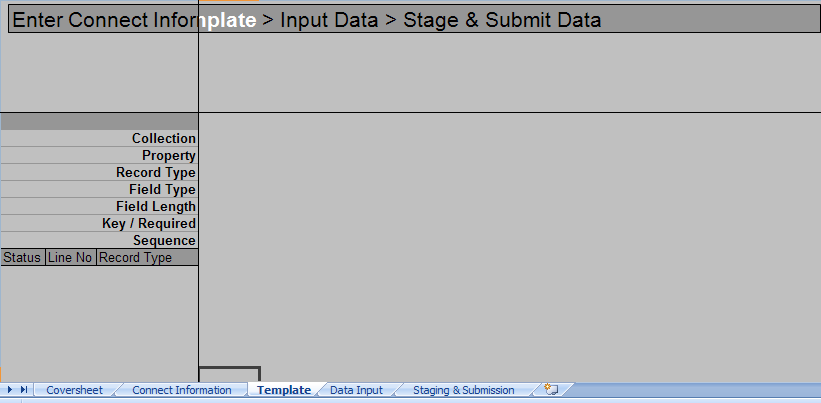
Once submitting this utility will import the structure of the CI in the following way into Template tab
Collection : Scroll Data of the underlying component
Property : Fields on the page
Record Type : Indicates the number related to scroll
The level 0 scroll record is always represented by 000. Level 1 scroll records appear with numbers that start with 100 and always have 00 as the last two numbers.
Level 2 scrolls are identified by numbers that start with the identifier of their level 1 parent and end with a 0.
Level 3 scrolls are identified by the first number from the level 1 parent, the second number from its level 2 parent, and then the third number from its own position in the list.
The numbers for each scroll level are incremented based on the number of records that exist at that level. For example, level 0 would be 000, level 1 would be 100, level 2 would be 110, and so on.
Field Type :Data Type of the field
Field Length : Length of the field
Key : Indicates the key structure of the field , This information comes from the record structure it self
Sequence : The sequence number represents the property order in the template
Now make the fields into Gray by selecting them and click on Select Input Cell from menu , Here gray indicates that those are fields that you are including in your Template , Template looks like in the following way

Now Click on New Data Input from Menu to make final template which accepts data from user.
Builds a new data input sheet based upon the selected input cells. When you build a new data input sheet, the system prompts you as to whether you want to overwrite the existing sheet. If you select Yes, a new data input sheet is created, overwriting the former one.
> Once after clicking it , It prompts you in the following way

Click on Yes , now we will enter into Data Input tab
6) Sample data is presented in the following way
Once the data entry is done proceed with clicking Stage Data for Submission button from the menu
7) Finally system will automatically enters into final tab Staging & Submission tab
8) Finally click on Submit Data , It prompts for ID,Pwd .Supply the values & click on OK . It automatically populates the data into DB.
Thanks but also to mention, the employee shouldn't hold ROLE 'PeopleSoft Administrator'
ReplyDeletei spent awhile to troubleshoot that... after remove the WEBLIB_SOAPTOCI access, still my support account can mass insert.
But anyway, thanks for the useful info
very much useful :)
ReplyDeleteReally useful. Thanks.
ReplyDeleteThanks for this! Very useful
ReplyDeleteHow to use PeopleSoft ExceltoCI Utility
ReplyDeleteI am trying to insert multiple child rows, but it is not allowing. please help
ReplyDeleteHi Please share the scenario -
ReplyDeleteThanks for the information very helpful. I have 2 question, 1. we are mass termination of 9500 records. the process is taking over 10 hours, is there anyway to tune the process? Or collect stats where the problem is. 2. We are only able to run 1000 records at a time. otherwise the process timesout. Thanks for the help.
ReplyDeleteAnyone tried inserting multiple child rows? The spreadhseet is requiring the second child row to be entered horizontally instead of vertically, how do I get it to go vertical:
ReplyDeleteI clicked Insert New Child, but it only works like this:
BI_HDR: BU, INVOICE, BI_LINE 1, BI_LINE 2, BI_LINE3
Instead of:
BI_HDR: BU, INVOICE, BI_LINE1
BI_LINE 2
BI_LINE 3
I have been looking for an answer for this for last 2 years... but looks like it is impossible :)
DeleteThe delivered Excel template by PS automatically insert/update data in database upon submit. Is it possible that it will not insert any row of data if one or more rows input data encountered error?
ReplyDeleteThanks.
Albert
Please reply on this
DeleteIs it possible to restrict the user with a particular role (say admin_payroll) to update data? I wanted to have this role with only create option available, so that the users with this role & permission list could not modify the history data.
ReplyDeleteKindly let me know.
Thanks
I have been using this for a while, I have hit a problem. The status goes to OK but no change is made in the server. Any help would be appreciated?
ReplyDeleteIt's such nice content! Thanks for sharing content and such nice information for me. I hope you will share some more content about Mastering Excel
ReplyDelete. Please keep sharing!